
A mirror falls harder than it looks. One wrong anchor, one skipped measurement, and you’re dealing with a cracked frame, a hole in the drywall, and a mirror that was never level to begin with. The good news: hanging a mirror well isn’t complicated — it just requires doing things in the right order. This guide walks through every step, from picking up the right tools to choosing the best spot on the wall, so you end up with a mirror that’s secure, straight, and exactly where you want it.
Tools & Materials Needed
Before anything touches the wall, get everything together. Stopping mid-project to hunt for a drill bit is how mistakes happen.
Basic tools:
- Tape measure
- Pencil
- Level (a standard spirit level or a laser level both work)
- Drill and drill bits (standard twist bits for drywall/wood; masonry bits for brick or concrete)
- Hammer
- Screwdriver (flathead and Phillips)
- Stud finder
- Painter’s tape
Hardware (varies by method):
- Wall anchors or toggle bolts
- Wood screws (for stud mounting)
- Picture hanging hooks or D-ring hooks
- Picture hanging wire
- French cleat (for heavy mirrors)
- Mirror clips (for frameless mirrors)
Optional but useful:
- Bathroom scale (for weighing the mirror)
- Cardboard or craft paper (for making a wall template)
- Multi-function detector (scans for wires and pipes behind the wall)
| Mirror Type | Recommended Hardware |
|---|---|
| Lightweight framed (under 10 lbs) | Single picture hook + nail |
| Mid-weight framed (10–35 lbs) | D-rings + wire + wall anchors or studs |
| Heavy framed (35–50 lbs) | Toggle bolts or stud screws + D-rings or wire |
| Very heavy (50 lbs+) | French cleat mounted into studs |
| Frameless | Mirror clips or mirror adhesive |
Determine Mirror Weight
Weight drives every decision that follows — the anchor type, the number of hanging points, and whether you need a second person. Check the product packaging or manufacturer’s spec sheet first. If neither is available, step on a bathroom scale holding the mirror, then subtract your own weight. That gives you a close enough number.
As a general rule:
- Under 10 lbs — a standard nail or adhesive strip is fine
- 10–35 lbs — use wall anchors rated above the mirror’s actual weight
- Over 35 lbs — mount into wall studs wherever possible
- Over 50 lbs — a French cleat spanning two or more studs is the safest option
Always choose hardware rated for more than the mirror’s actual weight. A 20-lb mirror on a 20-lb-rated anchor leaves no margin if the anchor shifts slightly or the drywall softens over time.
Identify Wall Type
The same screw that holds fine in drywall will spin uselessly in plaster and shatter a tile. Know what you’re working with before drilling anything.
Quick identification test: Press a thumbtack firmly into the wall.
- Slides in easily → drywall
- Hard to push in, crumbles slightly → plaster
- Won’t go in at all → brick, concrete, or tile
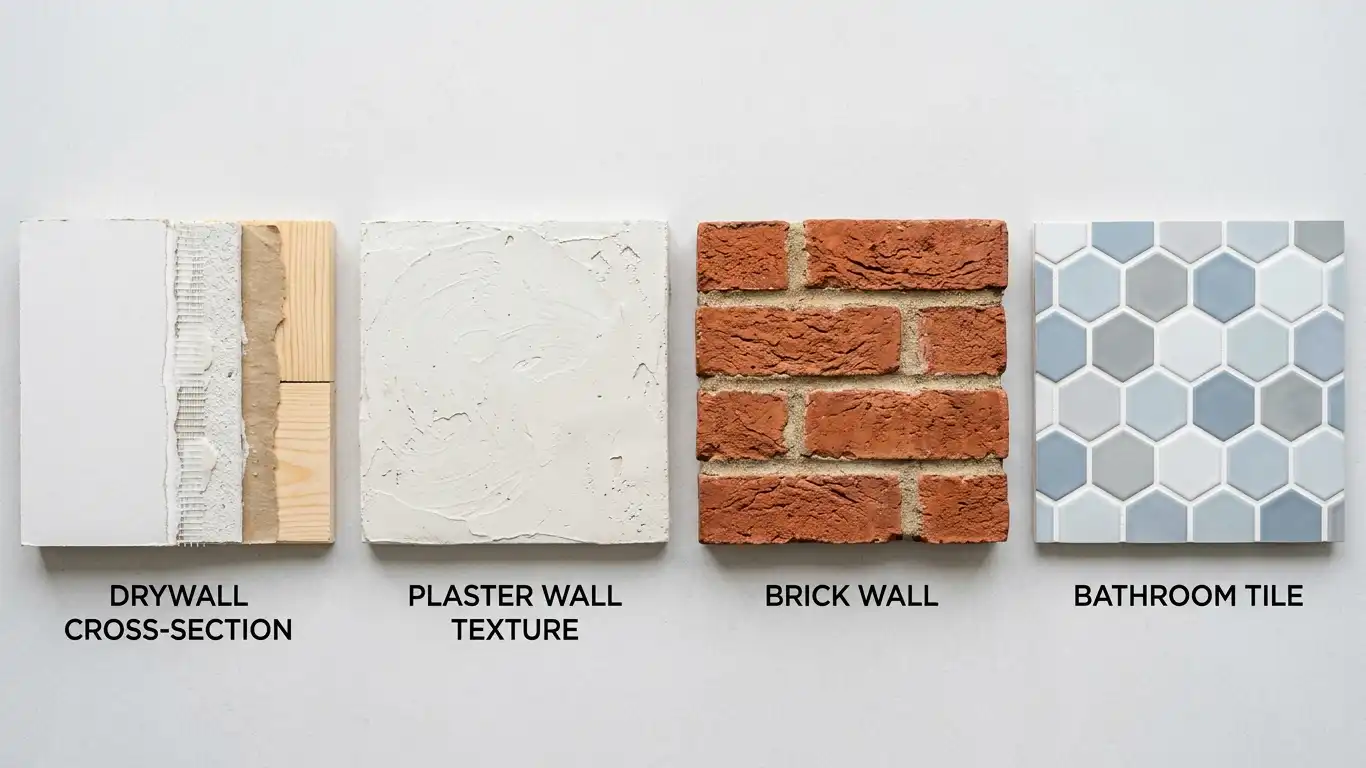
The four common wall types:
| Wall Type | Characteristics | What You Need |
|---|---|---|
| Drywall | Soft, common in newer homes | Standard anchors, toggle bolts, or stud screws |
| Plaster | Dense, found in older homes, can crack | Toggle bolts or masonry anchors; avoid heavy hammering |
| Brick / Concrete | Very hard, strong load capacity | Masonry drill bit + masonry anchors or hammer screws |
| Tile | Brittle surface, risk of cracking | Diamond-tip drill bit; low drill speed; use mirror adhesive where possible |
Use Wall Anchors / Drywall Anchors
When there’s no stud at the spot you want, a wall anchor is what keeps your mirror on the wall. Not all anchors work the same way, and using the wrong one for your wall type or mirror weight is one of the most common reasons mirrors fall.
Three main anchor types:
Plastic expansion anchors are the ones that come in the box when you buy most frames. They work for lighter items — under 20 lbs — but can loosen in drywall over time. Insert into a pre-drilled hole, then drive your screw in to expand the anchor.
Toggle bolts (also called butterfly anchors) are the strongest option for hollow walls. Drill a hole large enough for the folded toggle to pass through. Push the bolt in, the wings open behind the drywall, then tighten. Good for 30–90 lbs depending on size.
Self-drilling anchors skip the pre-drill step — you drive them directly into drywall with a screwdriver. Faster to install, solid for mid-weight items up to about 50 lbs.
Finding and using studs: A stud finder makes this reliable. Slide it slowly across the wall until it beeps or lights up. Mark both edges of the stud, then use the center. Drive a 2½-inch wood screw directly into the stud — no anchor needed. This is always the strongest option when the stud location works for your mirror placement.
Mark & Measure Placement
This is where most crooked mirrors are born. Rushing the marking step costs more time than it saves.
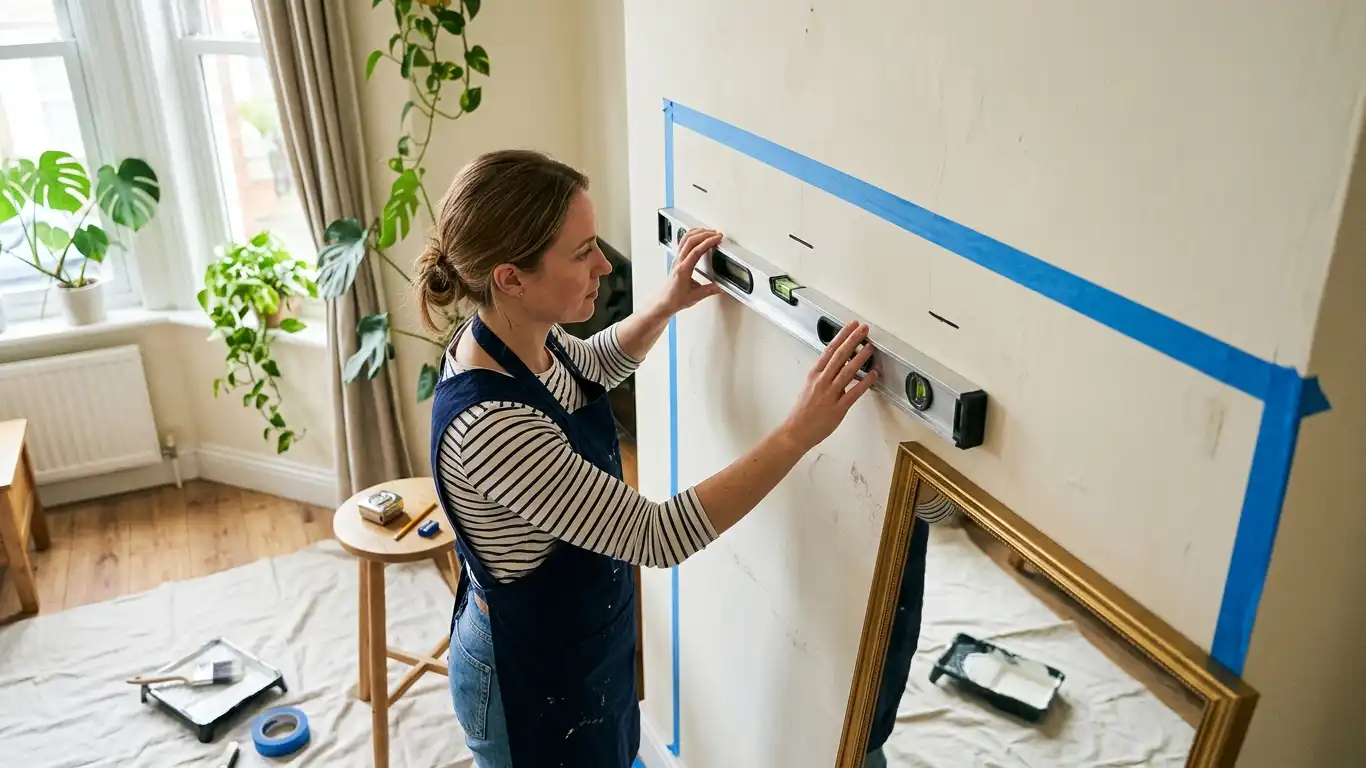
Step 1 — Find your center point. Decide where the mirror should sit. For a mirror above furniture, measure the width of the furniture and find the midpoint. Mark it lightly on the wall.
Step 2 — Set your height. The standard hanging height puts the mirror’s center at 57–65 inches from the floor (more on this in Section 7). Measure up from the floor and mark that point on your center line.
Step 3 — Account for the hanging hardware. This step differs by hardware type:
- Wire hanging mirrors: Hold the wire taut with two fingers, mimicking how it will sit on the hooks. Measure the distance from the top of the frame to your fingers. Subtract this from your top-edge measurement to find where the hooks go.
- D-ring mirrors: Measure the distance from the top of the frame to each D-ring. Transfer those measurements to the wall from your top-edge reference mark.
Step 4 — Verify level. Use your level to confirm both hook marks are perfectly horizontal. Even a 2mm difference shows as a visibly tilted mirror.
Step 5 — Use a cardboard template (optional but recommended for large mirrors). Cut out a piece of cardboard the same size as your mirror. Tape it to the wall and step back. This gives you a realistic preview before making any holes.
How to Safely and Accurately Hang a Mirror
With everything measured and marked, this is where the physical work happens. Read through the full section before starting.
Pre-hang checklist:
- Hardware is rated for the mirror’s weight
- Wall type confirmed and correct anchors/drill bits ready
- Both mounting points marked and level-checked
- Multi-function detector run across the area (check for pipes and wires)
- A second person available for mirrors over 20 lbs
Drilling and installing anchors: Drill straight into the wall at each mark — don’t angle the drill. For drywall anchors, the hole diameter should match the anchor’s packaging spec. Tap anchors flush with the wall surface, then drive in your screw or hook, leaving a small gap for the wire or D-ring to seat on.
Hanging by method:
Wire hanging: Have one person hold the mirror while the other guides the wire onto both hooks simultaneously. Don’t let the wire catch on just one hook first — the uneven load can pop it off.
D-ring hanging: This takes precision. Have a helper hold the mirror close to the wall while you align each ring with its hook. Lower slowly until both rings seat at the same time.
French cleat: The wall piece goes up first, screwed into studs. The mirror piece attaches to the back of the mirror frame. Tilt the mirror slightly forward at the top, hook the cleat, and let it settle flush against the wall.
Mirror clips (frameless): Install the bottom clips first, level them, then lift the mirror into place. Add the top clips last and tighten.
After hanging — immediate checks:
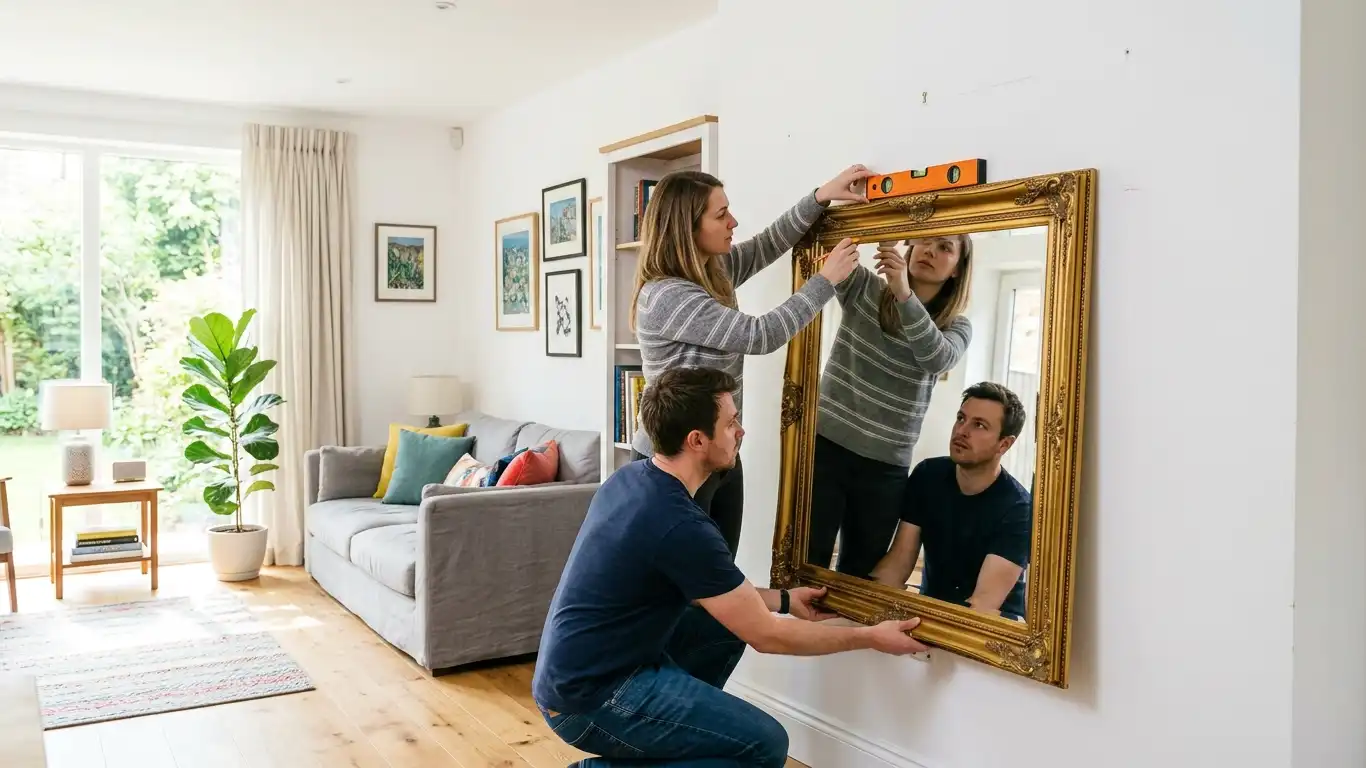
- Place your level on the top edge of the mirror. Adjust left or right as needed.
- Push gently from the side — the mirror should not shift or wobble.
- Check that the mirror sits flush against the wall, not tilted forward at the bottom.
- Step back and check for visible tilt from across the room.
Safety notes:
- Always use a multi-function detector before drilling — electrical wires and pipes don’t announce themselves
- Wear safety glasses when drilling into masonry
- Protect glass edges with painter’s tape during handling
- Use a stable step stool, not a chair, for high installations
- For mirrors over 35 lbs, always have a second person — solo handling of heavy glass is a genuine risk
Mirror Height & Eye Level
The standard rule is simple: hang the mirror so its center sits at 57–65 inches from the floor. This places most of the reflection at eye level for an average adult. But context adjusts this.
Room-by-room height guide:
| Location | Recommended Center Height | Notes |
|---|---|---|
| General wall (no furniture below) | 57–65 inches from floor | Standard eye-level range |
| Above a console or dresser | 4–6 inches above the furniture top | Creates visual connection to the piece below |
| Bathroom vanity | 5–8 inches above the countertop | Functional first — should show face clearly |
| Above a sofa | 6–8 inches above the sofa back | Too high looks disconnected |
| Above a fireplace mantel | 4–8 inches above the mantel | Scale matters — wider mantel = wider mirror |
| Full-length mirror | Bottom edge 8–12 inches from floor | Allows full view from shoes upward |
For households with very different heights, compromise by splitting the difference, or hang slightly lower — it’s easier to compensate for a lower mirror than a high one.
If placing a mirror above furniture, the mirror’s width should be roughly two-thirds of the furniture’s width. Going wider looks top-heavy; going much narrower looks lost.
Hanging a Mirror Without Nails or Drilling
Renters, people with tile walls, or anyone who wants flexibility without permanent holes have real options. The key is matching the method to the mirror’s weight — no-drill solutions have clear limits.
Command Strips / Adhesive Strips
The most accessible option. Interlocking adhesive strips attach to both the back of the frame and the wall, then click together. They hold cleanly and remove without paint damage when pulled straight down.
- Weight limit: up to 20 lbs for large strips (always check the packaging for your specific product)
- Best for: lightweight decorative mirrors with flat frames
- Not suitable for: heavy mirrors, humid bathrooms (adhesive weakens in moisture), or textured walls
Mirror Adhesive / Mastic
A permanent bond between the mirror and the wall. Strong, invisible, and works on most surfaces including drywall, plaster, and tile. Apply in vertical lines on the mirror back, press firmly into place, and use painter’s tape to hold it while the adhesive cures (usually 24–48 hours).
Use only adhesive labeled “safe for mirrors” — standard construction adhesive contains solvents that attack the silver backing on glass mirrors and cause black-edge damage over time.
- Best for: frameless mirrors, bathroom installations, permanent setups
- Downside: very difficult to remove without wall damage
Mirror Clips with Adhesive Backing
Clips that stick to the wall using industrial adhesive rather than screws. The mirror rests in the clips. Less permanent than full mastic, more secure than strips alone. Works well for frameless mirrors up to around 25–30 lbs.
| Method | Max Weight | Removable? | Best Wall Surface |
|---|---|---|---|
| Command Strips | ~20 lbs | Yes | Smooth painted walls |
| Mirror Adhesive/Mastic | 50+ lbs | No (difficult) | Most surfaces |
| Adhesive Mirror Clips | ~25–30 lbs | Partially | Smooth walls |
If you’re considering a LED bathroom mirror for a rental space, adhesive clips combined with a lightweight frame are usually the most practical approach.
Common Mistakes to Avoid
Most hanging problems are predictable. These are the ones that show up repeatedly.
Using one anchor for a wide mirror. A single center point creates a pivot — the mirror will rotate. Wide mirrors need two anchor points spaced apart, which distributes weight and prevents tilting.
Skipping the wall type check. A plastic expansion anchor in plaster won’t hold. A standard twist bit on tile will crack it. Five seconds with a thumbtack saves a cracked tile or a collapsed anchor.
Hanging too high. Eye level means the mirror center, not the top. People consistently hang mirrors too high. If the center is above 65 inches, most users will see the ceiling more than their face.
Not checking what the mirror reflects. A mirror opposite a cluttered counter, a toilet, or an overhead fan looks wrong every time. Before drilling, hold the mirror in position and look at the reflection. If it’s not something you want to see repeatedly, shift the placement.
Using construction adhesive instead of mirror adhesive. Standard adhesives contain solvents that eat the silver layer on the back of glass mirrors. Dark spots and black edges appear within months. Always use adhesive specifically labeled for mirrors.
Not checking for level after hanging. A mirror that looks level while you’re standing next to it often shows a visible tilt from across the room. Always check with a level, then step back and look again from 8–10 feet away.
Worn or mismatched original hardware. If the mirror comes with D-rings already attached, inspect them. Loose screws, corroded metal, or thin wire on a heavy mirror are all failure points. Replace hardware that looks worn.
Mirror Placement & Decor Tips
Once the mirror is secure, placement decisions shift from technical to visual. A well-placed mirror does more than reflect — it shapes how a room feels.
Think about what the mirror reflects. This matters more than most people realize. A mirror facing a window doubles the natural light in the room. A mirror facing a piece of art creates depth. A mirror facing a blank wall or a cluttered surface just amplifies whatever problem is already there. Before committing to a spot, stand where the mirror will hang and look at what’s directly behind you — that’s the reflection your guests will see.
Scale the mirror to the wall and the furniture. A small mirror on a large empty wall disappears. A mirror wider than the furniture below it looks unbalanced. As a starting point, the mirror should be about 60–70% of the width of whatever it hangs above.
Use mirrors to fix problem spaces. A narrow hallway opens up with a tall vertical mirror on one wall. A dark room with no window benefits from a large mirror on the wall opposite any light source — even artificial. A low-ceilinged room feels taller with a tall, narrow mirror.
Room-specific tips:
Living room: Above a sofa or console, centered, never wider than the furniture. Reflect a window or a lamp, not the TV.
Bedroom: A full-length mirror works best on a wall adjacent to the wardrobe rather than directly facing the bed. If you’re adding a lighted option, an LED wall mirror adds both function and ambiance without needing a separate light fixture.
Bathroom: Functional placement first. The mirror should center on the sink and sit high enough to show your full face. If you’re upgrading, consider an LED bathroom mirror — built-in lighting removes the shadow problem that comes from overhead-only fixtures. For guidance on selecting the right size and style, see the LED mirror selection guide for bathroom upgrades.
Entryway / hallway: A mirror near the front door serves a practical function. Keep it at eye level and make sure it reflects something pleasant — a lamp, a plant, or the outdoors if there’s a window nearby.
Gallery walls with mirrors: Mixing mirrors with framed art works well when the frames share a finish (all black, all brass, all natural wood). Vary the shapes — one round mirror among rectangular frames adds interest. Space everything 2–3 inches apart for a cohesive look.
If you want to add lighting to an existing mirror rather than replacing it, the process is more straightforward than it sounds. LuckMirror’s guide on how to add LED lights to the back of a mirror covers the full process, from choosing the right LED strip type to concealing the wiring.
Summary
Hanging a mirror well comes down to four things done in order: know the weight, know the wall, use the right hardware, and measure twice before drilling once. The installation itself — whether you’re driving screws into studs, setting toggle bolts in drywall, or pressing adhesive clips to tile — takes less than 30 minutes when the prep work is done properly. After it’s up, height and placement turn a functional fix into something that actually improves the room. Get those right, and the mirror earns its spot on the wall every time someone walks past it.
Frequently Asked Questions
How do you hang a heavy mirror on drywall without studs?
Use toggle bolts rated above the mirror’s weight. Drill a hole large enough for the folded toggle to pass through, insert the bolt, let the wings open behind the drywall, and tighten until snug. For mirrors over 50 lbs, it’s worth repositioning to find a stud or using a French cleat mounted across two studs.
What is the correct height to hang a mirror on a wall?
The center of the mirror should sit 57–65 inches from the floor for a standard wall hang. When placing above furniture, position the mirror’s bottom edge 4–8 inches above the top of the piece below. In bathrooms, height is determined by function — the mirror should frame your face clearly when standing at the sink.
Can you hang a mirror on a wall without nails or drilling?
Yes, for mirrors under 20 lbs. Command strips (adhesive hanging strips) work well on smooth painted walls and remove cleanly. For frameless mirrors or heavier pieces, mirror adhesive (mastic) creates a permanent bond without any drilling. Avoid using standard construction adhesive — it damages the mirror’s silver backing.
How do you hang a frameless mirror on a wall?
Frameless mirrors have no frame to attach hardware to. The two main options are mirror clips — small brackets screwed into the wall that grip the mirror’s edges — or mirror adhesive applied directly to the back glass. Clips allow removal; adhesive is more permanent but invisible from the front.
How far above a sofa should a mirror be hung?
The bottom edge of the mirror should sit 6–8 inches above the sofa’s back cushions. This creates a visual connection between the two pieces without the mirror appearing to float too high. The mirror’s width should be roughly two-thirds the width of the sofa for balanced proportions.