
Drilling into tile is risky. Drilling into a rented apartment’s wall might cost you your deposit. And drilling through a mirror itself is a job most people would rather not attempt. That’s why so many homeowners now skip the screws entirely and bond mirrors straight to the wall with adhesive. Done right, a glued mirror sits perfectly flush, holds for decades, and leaves no visible hardware. Done wrong, it slides down the wall overnight, or worse, develops ugly black spots a year later because the glue quietly ate through the silver backing. This guide walks you through the whole decision, from choosing between glue and hardware to handling tricky surfaces and special mirrors, so your installation falls into the first category.
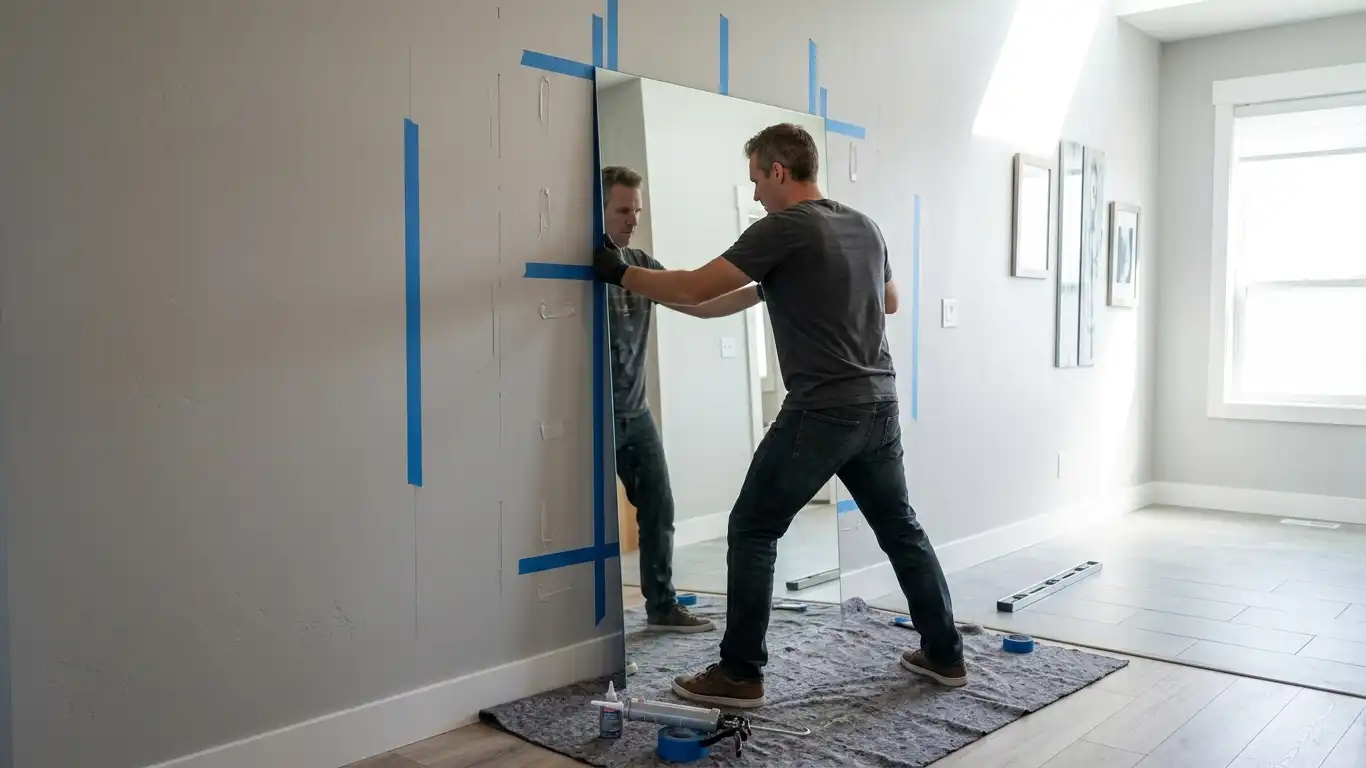
Adhesive or Mechanical Fixing? Make This Call First
Before buying any glue, decide whether gluing is actually the right method for your situation. Each approach has a clear trade-off.
Adhesive gives you a clean, flush look with no clips or screw heads, and it works on surfaces you can’t easily drill, like ceramic tile. The catch is permanence. Mirror adhesive is designed never to let go. Removing a glued mirror later usually means cutting it free with wire and repairing the wall behind it.
Mechanical fixings (clips, brackets, J-channels) are reversible and their weight capacity is easy to verify, but they require drilling and the hardware stays visible around the edges. If you’d rather go that route, see this separate guide on how to hang a mirror on a wall with hardware.
Ask yourself three questions:
- Is this permanent? If you might redecorate or move the mirror within a few years, don’t glue it.
- Can the wall be drilled? Tile, glass splashbacks, and some rental walls push you toward adhesive.
- How heavy is the mirror? This one deserves its own section, below.
Many professionals split the difference with a “belt and braces” setup: a small ledge, batten, or pair of clips carries the weight at the bottom, while adhesive holds the middle and top flat against the wall. You get the security of hardware with almost none of it showing.
Weight and Size Limits: When Glue Alone Isn’t Enough
Adhesive strength is rarely the weak point. The weak point is whatever the adhesive is stuck to: paint film, drywall paper, or old plaster. That’s why weight and size limits matter more than the numbers printed on the glue tube.
Two practical thresholds come up again and again in manufacturer guidance:
- Around 10 kg (22 lb). Below this, a quality mirror adhesive on a sound wall generally holds on its own. Above it, plan for mechanical backup.
- Around 60 × 60 cm (2 × 2 ft). Liquid Nails, for example, requires mirrors at or above this size to rest on a physical support (clips, a lip, or L/J hooks) while the adhesive cures and afterward.
To estimate weight before you buy anything: standard 4 mm mirror glass weighs roughly 10 kg per square meter, and 6 mm glass about 15 kg per square meter. A 1.2 × 0.8 m mirror in 6 mm glass is therefore around 14–15 kg — firmly in “add a support” territory. If you’re still choosing the mirror itself, sorting out dimensions first makes the mounting decision easier; this bathroom mirror size guide covers how to match mirror size to your space.
Useful mechanical helpers, roughly in order of visibility:
- Bottom ledge or backsplash — often already there above a vanity, completely invisible as “hardware”
- A screwed-on timber or metal batten — hidden behind the mirror’s lower edge
- J-channel — a slim aluminum rail the mirror sits in
- Mirror clips or L-hooks — small but visible at the edges
Why Mirrors Need a Special Adhesive
Here’s the mistake that ruins the most mirrors: grabbing whatever construction adhesive or silicone is already in the garage.
A mirror is glass with a thin reflective coating (usually silver, sometimes copper-backed) protected by a layer of paint. That backing is chemically delicate. Solvent-based adhesives and acid-cure silicones attack it slowly. You won’t see anything at first. Months later, dark blotches and edge “de-silvering” appear on the reflective side, and there’s no fixing it — the mirror is done, and it’s glued to your wall. If you ever inherit that problem, here’s how to remove a mirror glued to the wall without cracking it.
So the single most important buying rule is simple: the label must say mirror-safe, mirror adhesive, or neutral-cure. Solvent-free formulas are the safe default. Everything else in this article assumes you’ve cleared this hurdle.
Silicone, Polyurethane, or Epoxy: What’s Actually in the Tube
Mirror-safe products fall into a few chemical families, and each behaves differently on the wall.
Neutral-cure silicone stays flexible for its entire life, shrugs off humidity and temperature swings, and is the classic choice for bathrooms. Its initial grab is modest, so temporary support is non-negotiable.
Polyurethane and MS-polymer (hybrid) adhesives are the mainstream “mirror mastic” category. They grab hard almost immediately, fill small gaps in uneven walls, and most modern versions are solvent-free and nearly odorless.
Epoxy cures fast and rigid. It suits small mirrors or spot-bonding, but its stiffness transfers every wall imperfection into the glass, and working time is short.
| Property | Neutral-cure silicone | PU / MS-polymer mastic | Two-part epoxy |
|---|---|---|---|
| Initial grab | Low – needs full support | High – light support only | Very high |
| Full cure time | 24–72 h | 24–48 h | Minutes to hours |
| Flexibility after cure | Very flexible | Flexible | Rigid |
| Moisture resistance | Excellent | Good to excellent | Good |
| Repositioning window | Several minutes | Very short | Almost none |
| Best for | Bathrooms, humid rooms | General walls, tile, most DIY jobs | Small mirrors, spot fixes |
Table compiled from manufacturer technical guidance published by Henkel (Loctite/UniBond/LePage mirror-installation guides) and PPG (Liquid Nails).
Know Your Wall: Surface-by-Surface Preparation
The adhesive bonds to whatever it touches — and if that’s flaking paint or wallpaper, the paint or paper becomes your real anchor. Check the wall honestly before committing.
| Wall type | Can you glue directly? | What to do first |
|---|---|---|
| Bare drywall / plaster | Yes | Prime and let dry; raw paper and plaster are too absorbent |
| Painted wall (matte) | Usually | Confirm paint is well bonded — tape-pull test a hidden spot |
| Painted wall (glossy) | Yes, after prep | Sand lightly to dull the sheen, then wipe clean |
| Ceramic tile | Yes | Tap-test for hollow (loose) tiles; degrease thoroughly |
| Bare concrete / brick | Yes | Brush off dust; skim or shim serious unevenness |
| Wallpaper | No | Remove the paper in the mirror’s footprint — glue to the wall, never to paper |
Two prep rules apply everywhere. First, the surface must be clean, dry, and grease-free; a wipe with isopropyl alcohol handles most residues. Second, aim to work in moderate temperatures — very hot or cold rooms slow curing and weaken early grab.
Gluing to Tile, Brick, Stone, and Wood
Beyond the general wall check, four common substrates have their own quirks.
Tile
Tap every tile in the mirror’s footprint. A hollow sound means the tile itself is loose, and no adhesive can save that. Put your adhesive beads on the tile faces, not on grout lines, and degrease — bathroom tile carries an invisible film of soap and body oils.
Brick
Apply adhesive to the brick faces, not the mortar joints, which are weaker and often crumbly. Dust is the enemy; brush the surface hard first.
Natural stone
Marble and some light stones can absorb components from certain adhesives and develop shadowy stains visible on the surface. Use a product explicitly rated for natural stone (many mirror adhesives are labeled “mirror, marble & granite” for exactly this reason).
Wood and cabinet doors
Wood moves with humidity, so flexible adhesives (silicone or MS-polymer) beat rigid ones here. On a wardrobe door, keep the glue pattern symmetrical so the panel doesn’t bow, and check the door can carry the extra weight on its hinges.
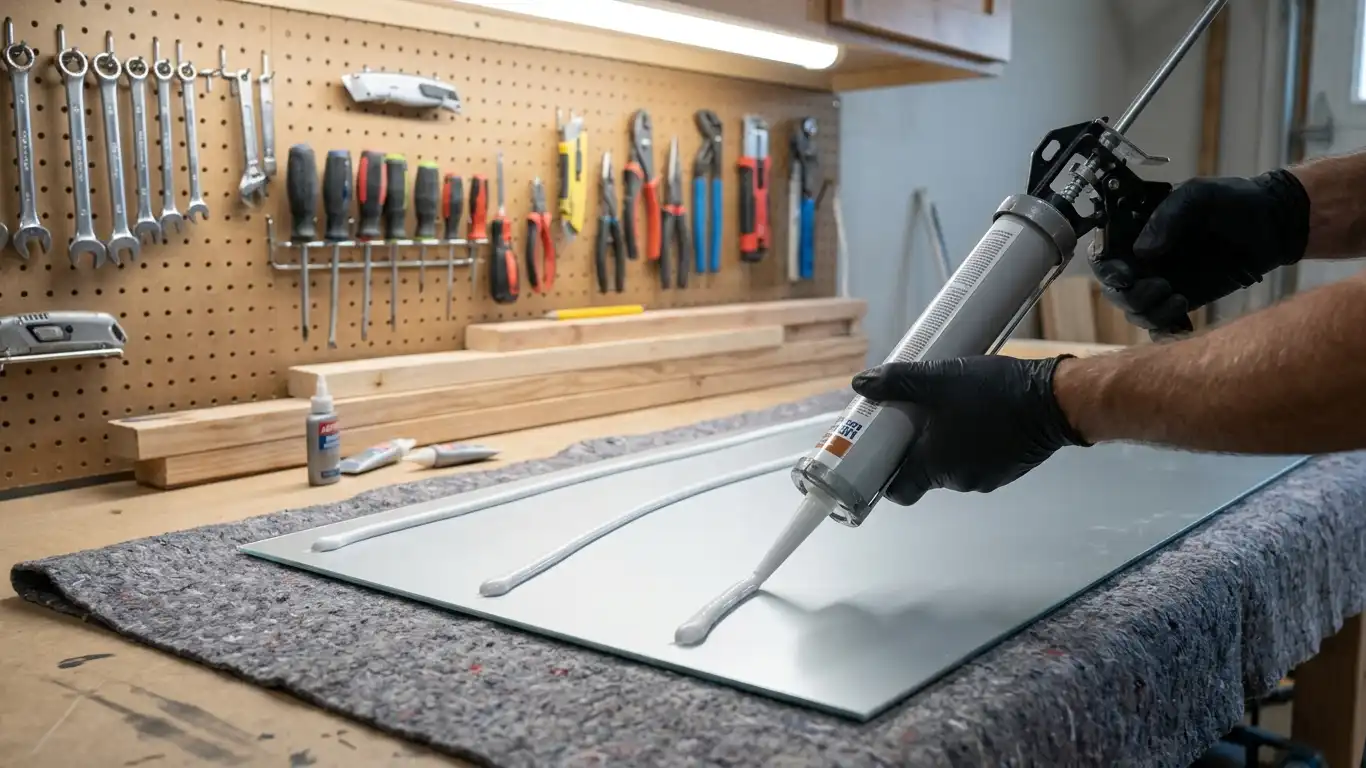
Applying the Adhesive: Pattern Matters More Than Quantity
More glue is not better glue. A thick, careless application makes the mirror slide, squeezes out at the edges, and can even distort thin glass into a funhouse reflection. The professional pattern looks like this:
- Lay the mirror face-down on a padded, clean surface.
- Apply vertical strips of adhesive, each a few millimeters thick.
- Space the strips 10–15 cm (4–6 in) apart across the back.
- Stay at least 5 cm (2 in) from every edge so nothing oozes out when you press.
- Never run adhesive around the perimeter as a sealed frame. Vertical strips leave channels that let air circulate and moisture drain behind the glass. Trapped humidity is a leading cause of backing corrosion, which is why Liquid Nails’ installation guidance specifically warns against sealing the edges.
| Application spec | Recommended value |
|---|---|
| Bead orientation | Vertical strips (allows airflow and drainage) |
| Bead spacing | Every 4–6 inches (10–15 cm) |
| Edge clearance | Do not seal around edges |
| Support requirement | Mirrors ≥ 2′ × 2′ need clips or a lip at the bottom |
| Cure time | 24–48 hours |
Source: PPG, “Install Mirrors the Right Way,” Liquid Nails official installation guidelines (ppgpaints.com).
Pressing, Supporting, and Curing: The First 48 Hours
This is where most failures happen, and it’s the least glamorous part of the job.
Mark the mirror’s final position on the wall with painter’s tape before any glue comes out — mirror adhesive offers seconds to a few minutes of adjustment, not a leisurely repositioning session. Tilt the top of the mirror slightly away from the wall as you align the bottom edge on your marks, check level, then press the whole face firmly so every strip makes full contact.
Then support it and walk away:
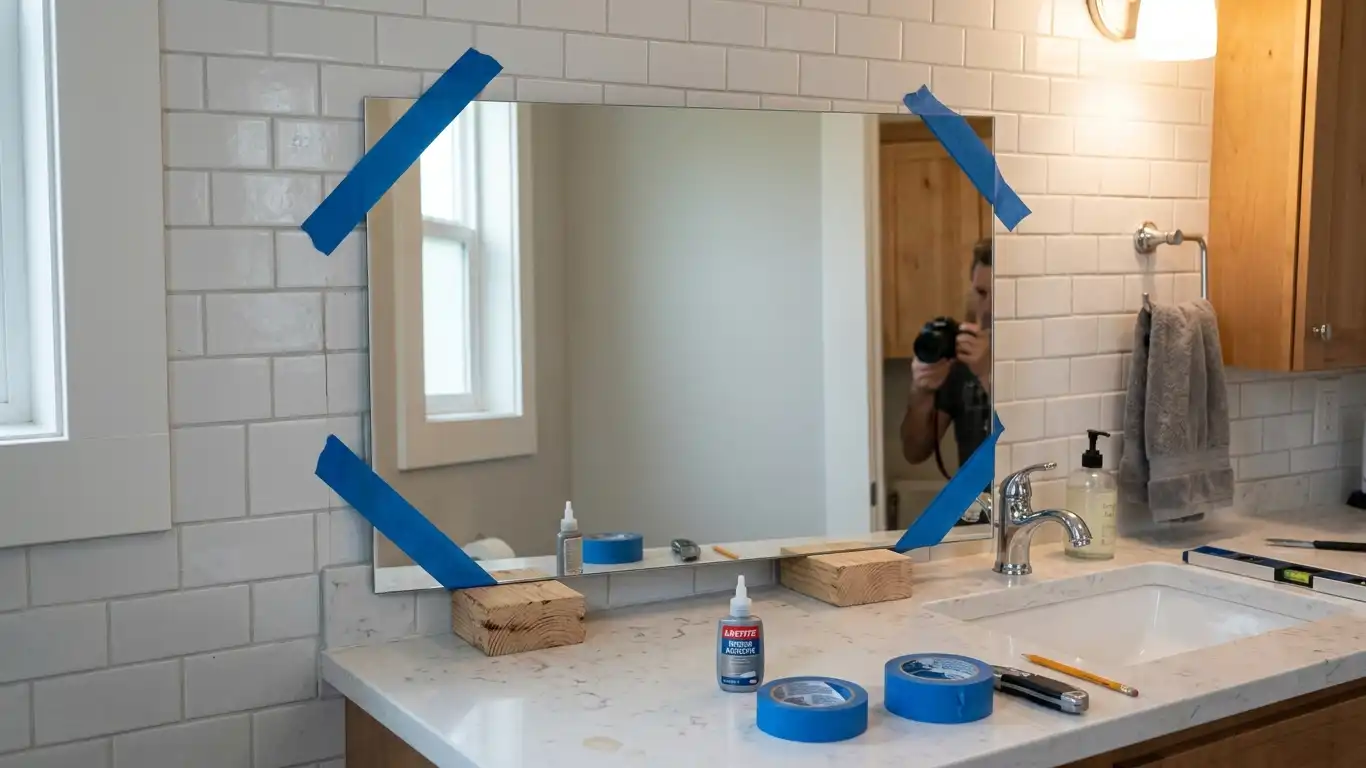
- Painter’s tape across the top and bottom corners handles light mirrors.
- Wood blocks or a batten under the bottom edge (resting on the floor, vanity, or backsplash) carry anything heavier.
- Leave supports in place for the full 24–48 hour cure, even if the mirror feels solid after an hour. Grab strength and cured strength are different things.
- Don’t lean anything against the glass during this window.
After curing, remove the tape gently, give the mirror a light shake test, and clean the glass. Wipe any squeezed-out adhesive with the solvent the manufacturer recommends — and keep solvents away from the mirror’s edges and backing.
Special Mirrors: LED, Acrylic, and Mirror Tile Walls
Standard technique covers standard mirrors. A few types need extra thought.
LED and anti-fog mirrors
Backlit mirrors have wiring, a driver, and sometimes a heating pad on the back, so you can’t simply butter the whole rear surface with glue. Plan the wall-side electrical connection first, keep adhesive strips clear of cables, LED channels, and heated zones, and check the manufacturer’s mounting instructions — many LED bathroom mirrors ship with dedicated brackets precisely because full-surface gluing would block heat dissipation and future servicing. For large or unusual installations, some manufacturers also offer customization with mounting systems matched to the wall type.
Acrylic mirror sheets
These lightweight panels telegraph every lump in the wall as a wavy reflection. They need a genuinely flat substrate and even adhesive coverage (or foam mounting tape across the whole back), and the protective film stays on until the very end.
Mirror tiles and gallery walls
Small tiles usually come with foam adhesive pads. Snap a level line, dry-lay the pattern on the floor first, and start from the bottom row up. The supplied pads are often minimal; adding tape or adhesive coverage is cheap insurance.
Heavy framed mirrors
A frame adds weight and often prevents the glass from sitting flat, which undermines adhesive contact. For these, hardware such as a French cleat is usually the better tool — decorative options like beveled bathroom mirrors frequently fall into this category.
Summary
Gluing a mirror to the wall is a genuinely reliable method when four things line up: the right decision (adhesive suits permanent installations under about 10 kg, or heavier ones with a bottom support), the right product (mirror-safe, neutral-cure, matched to your wall material), the right surface (clean, sound, primed or degreased as needed), and the right technique (vertical strips, edges left open to breathe, firm pressure, and full 24–48 hours of supported curing). Get those four right and the mirror will outlast the paint around it. Skip any one of them and you’re gambling with a sheet of glass on a vertical surface — and the failure usually shows up months later, when it’s hardest to fix.
FAQs
What is the best adhesive for hanging a mirror without nails?
A solvent-free, mirror-safe construction adhesive — typically a neutral-cure silicone or an MS-polymer/polyurethane “mirror mastic.” The critical requirement is compatibility with the mirror’s backing; ordinary acid-cure silicone or solvent-based glue will corrode the silver layer over time.
Can you glue a heavy mirror to drywall without studs?
Up to roughly 10 kg on sound, primed drywall, yes. Beyond that, the drywall’s paper face becomes the weak link, so add a bottom support — a batten, ledge, or clips — and let the adhesive keep the mirror flat rather than carry all the weight.
How long should you support a mirror glued to the wall?
Keep tape or blocks in place for the adhesive’s full cure, normally 24 to 48 hours. Early grab can feel deceptively strong, but the bond only reaches its rated strength after complete curing.
Why did black spots appear on my glued bathroom mirror?
That’s backing corrosion, usually caused by an incompatible adhesive attacking the silver coating or by moisture trapped behind glass whose edges were sealed with glue. Prevention is the only cure: mirror-safe adhesive, vertical strips, and open edges for airflow.
How do you glue a mirror to a tile wall without drilling?
Tap-test the tiles for hollow spots, degrease them thoroughly, apply mirror adhesive in vertical strips on the tile faces (avoiding grout lines), press the mirror onto pre-marked positions, and support the bottom edge until the adhesive fully cures.